http://www.youtube.com/watch?v=D9A_9FH7e-A&list=UUT8z80a4ESgO2Y4qajk-iXw&index=83
(The above picture and video link are not mine and belong to user cutepolish on YouTube!)
(The above picture and video link are not mine and belong to user cutepolish on YouTube!)
So I watched cutepolish's water marbling tutorial several times before attempting to try water marbling myself. As you can see the original picture/video uses primary colors, but as I mentioned before I wanted mine to be Valentine's Day themed so I went with two pinks and a purple. Here are the polishes I selected:
Polishes from left to right: ULTA "Tutu Cute", OPI "Italian Love Affair", and ULTA "Flamingo".
So after selecting my polishes I simply followed cutepolish's steps/directions in her video. (I suggest you watch her video to really understand how to properly water marble!) Which to sum it up including filling a small disposable cup with room temperature water (I used tap water since that is all I had!), and then to place tape around each of your nails. I placed a piece around my finger (and under the front end of my nail) and then placed a second piece right above my nail bed. It looked like this:
After that I simply painted a clear coat on my nails, followed by a coat of white nail polish. For the clear nail polish I used Sally Hansen Xtreme Wear in "Invisible" and for the white nail polish I used Sally Hansen Xtreme Wear in "White On." Here are my nails right before I started the water marble:
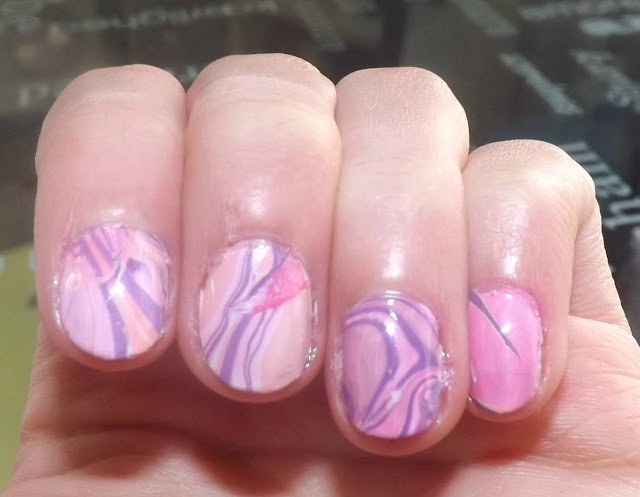
Okay so to water marble you simply drop dots of the nail polish you wish to use into the cup to form a bull's eye and then used a toothpick to create the design of your choice! You have to work relatively quickly because the polish on the water dries fast! Once you create your design you simply place your nail down into the water to adhere it to your nail, but BEFORE you remove your nail from the water you need to remove the excess nail polish from the top of the water. I used Q-tips for that part! Then you'll need to go ahead and remove the tape from the nail you just water marbled before the polish hardens too much (otherwise it will ruin your polish later). I used an old set of tweezers to help me and it worked pretty well. And then last but not least you simply need to clean up around each nail and add a topcoat! I used Orly's "Sec'NDry" on my nails! Here are my finished nails!
As you can see they didn't turn out perfect, but for a first attempt I am pretty happy with them! Also, as you can probably see, while removing the tape I accidentally smudged my middle finger's nail polish. I also had a bit of difficulty getting the right temperature for the water so my designs did not come out as clear as cutepolish's did in her YouTube video. (Which is especially obvious on my pinky finger!) I think with practice I can fully master the art of water marbling and I plan on trying it again soon!
Overall I thought water marbling would be extremely hard but I was pleasantly surprised at how easy it actually was! I definitely plan on trying water marbling out again soon!
Thanks for reading my blog! :)


